· FitFab Momma · Activities · 3 min read
DIY Sensory Fun! Easy Ziploc Water & Oil Bag for Babies!
I hope you and your little one have an absolute blast with this! It's such a simple way to bring a little bit of wonder and learning into their day.
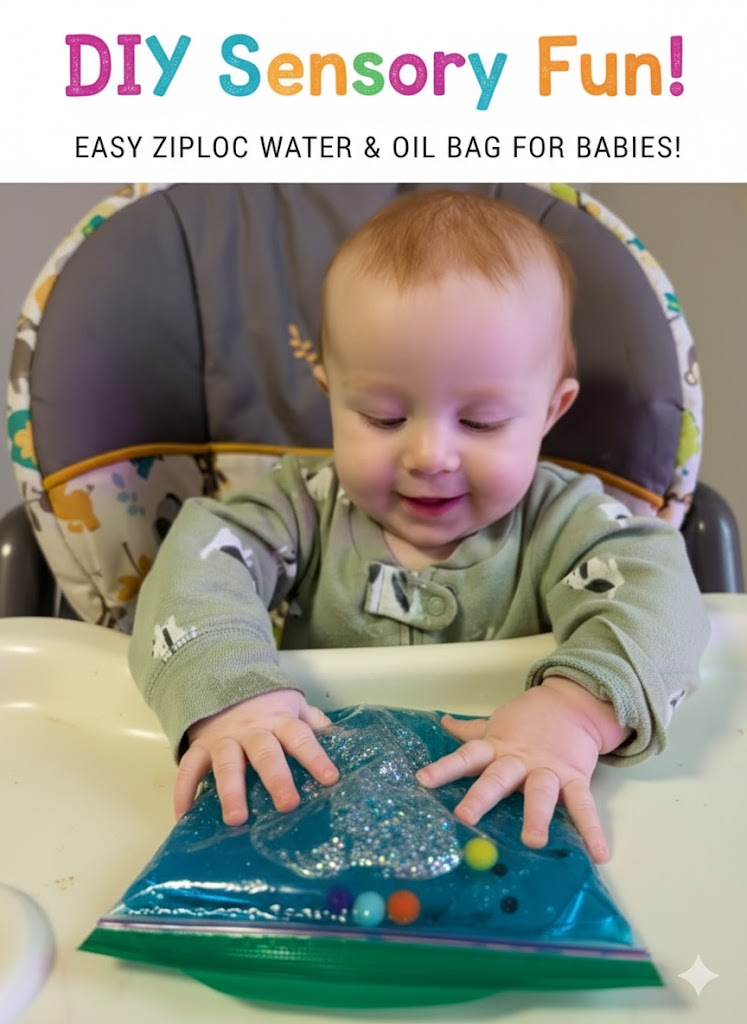
Hey there, fellow parents and caregivers! Are you looking for a simple, mess-free activity to keep your little one entertained and engaged? Well, you’ve come to the right place! Today, I’m sharing one of my absolute favorite DIY projects for babies: the Ziploc Water & Oil Sensory Bag!
Seriously, this thing is a game-changer. It’s incredibly easy to make, uses stuff you probably already have around the house, and provides endless fascination for tiny hands and curious minds. Plus, it’s completely sealed, so no worries about spills or tiny objects making their way into little mouths. Win-win-win!
Why Sensory Play is So Awesome for Babies
Before we dive into the how-to, let’s talk for a second about why sensory play is so important. Babies learn about the world by touching, squishing, looking, and exploring. Sensory bags like this one help them:
- Develop Fine Motor Skills: All that squishing and moving helps strengthen those little hand muscles.
- Encourage Exploration: They get to safely experiment with different textures and movements.
- Stimulate Senses: The colors, movement of the oil and water, and the feel of the bag provide great visual and tactile stimulation.
- Provide Calming Fun: Sometimes, the gentle movement and colors can be quite soothing for a busy baby!
Your Easy Sensory Bag Supplies:
Gather ‘round, because you barely need anything for this!
- A sturdy Ziploc bag: Quart or gallon size works great. Make sure it’s a good quality one that seals well!
- Water: Just regular tap water.
- Baby Oil: This is what creates that cool, mesmerizing effect!
- Food Coloring: To add a pop of color.
- Fillers: Sparkles, pompoms, beads, or small toy animals.
- Duct Tape: For extra security (don’t skip this!).
Time to Make the Magic Happen!
- Fill ‘er Up! Start by adding about 1/2 to 3/4 cup of water to your Ziploc bag. You don’t want to overfill it, as you’ll be adding oil too.
- Color Splash! Add a few drops of food coloring to the water and swish it around until you get your desired shade.
- Add the Goodies! Now’s the time to toss in your sparkles, pompoms, or other small treasures.
- Pour in the Oil: Slowly add about 1/4 to 1/2 cup of baby oil. You’ll immediately start to see that cool separation effect – the oil and water creating their own little world!
- Seal It Tight (and then seal it again!): This is the most crucial step! Carefully squeeze out as much air as possible before sealing. Grab that duct tape! Run a strip along the entire sealed edge and the corners. This ensures curious little fingers can’t accidentally pop it open.
- Wiggle and Play! Lay it down on a high chair tray or tape it to a window for a different kind of light play.
Tips for Max Sensory Fun:
- Change it Up: Try making different bags with different themes—one with glitter, one with pompoms, or even one with little plastic fish!
- Tummy Time Helper: These bags are fantastic for making tummy time more engaging for babies who usually resist it.
- Supervision is Key: While these bags are designed to be safe, always supervise your baby during playtime.
I hope you and your little one have an absolute blast with this! It’s such a simple way to bring a little bit of wonder and learning into their day.
Happy squishing!